


What is VPN ?
In the simplest terms, it creates a secure, encrypted connection, which can be thought of as a tunnel, between your computer and a server operated by the VPN service. In a professional setting, this tunnel makes you part of the company's network as if you were physically sitting in the office, hence the name. While connected to the VPN, all your network traffic passes through this protected tunnel, and no one in between can see what you are up to.VPN is also Used for open Block Sites.
Who Needs a VPN ?
The protection provided by a VPN offers many advantages. First and foremost, it prevents anyone on the same Wi-Fi hotspot (or anywhere else) from intercepting your Web traffic in a man-in-the-middle attack. This is especially handy for travelers and for those using public Wi-Fi networks, such as those at hotels, airports, and coffee shops. VPNs also cloak your computer's actual IP address, making it harder for advertisers (or spies, or hackers) to track you online.
Set up VPN in Window 10 :
To Set VPN in Window 10 just Follow the Steps:
1) Search VPN in Window Search box.
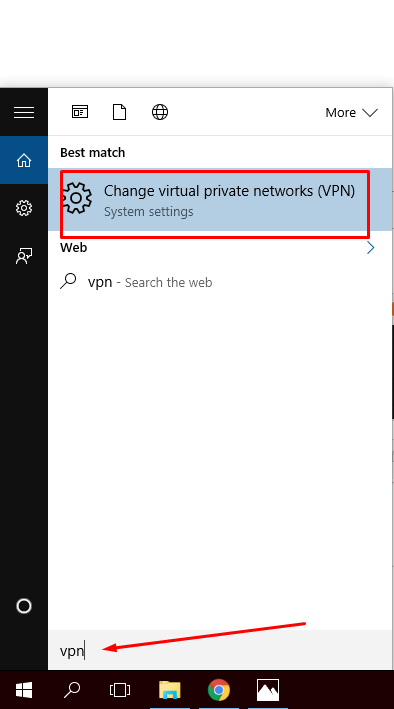

2) Click on "Change VPN" . Select VPN from List and click on " Add a VPN Connection" .

3) Set up Required Setting by Putting Your Network Settings and Click on Save.
Note: if You Have Not any VPN Settings (Address, User name, Password ) then Click Here to get Free Settings.

4) Now Click on Connect, if it asks for User Name or password, Provide your VPN Sign in information and Click Connect.


5) If Your Want To Disconnect From VPN. Click on Disconnect.


0 comments:
Post a Comment